Showing posts with label How-to. Show all posts

Tuesday, June 29, 2010

How to Make Your Own Cheese

About a year and a half ago, I did a post about how to make cheese from powdered milk.  We were living in the Philippines at the time and they do not have dairy products like what we have here.  They mainly have powdered milk or milk that is processed for a long shelf life, and both are pretty pricey.  I was really interested in making yogurt and simple cheeses like cottage cheese, or "farmers cheese", and some spreadable cheese.  Well, I was never able to make any before we returned to the states, so I just posted the recipes that I had found.  So now that we are back,  I thought a post on making your own cheese would be fitting.

We are starting to receive an abundance of goat's milk from some of the families that we fellowship with here, so Joanne has started making things like yogurt( made with the crockpot) and herbed farmers cheese.  I have 2 quarts of goats milk in the fridge right now and was looking up some information about liquid rennet and found this useful site-Fankhauser Cheese Course

Wow, this website has so much useful (besides my most favorite word when it comes to this kind of stuff)practical information, plus the next best thing; great step by step pictures:)  Here are some links from this site for:
I think I'm going to make yogurt first then experiment with some other cheeses.  Let me know if you make any of your own cheeses and if you have links to some of your creations, great!

Sunday, June 20, 2010

Where can I buy Medicinal Herb Plants?

I have recently wanted to grow my own medicinal herb plants, so that I can have the ones that I am planning to use on hand year around. I looked for awhile and was surpirsed that it took a long time to find this website- Crimson Sage Nursery.

They offer medicinal plant sets like:
Cold and Flu sets
Salve Making sets
Respiratory support sets
and many more.

I would like to eventually have a little greenhouse like the one I posted about a few weeks ago for just medicinal herbs, but probably not this summer.

Thursday, June 17, 2010

How to make Herbal Popsicles- Herb Mentor Newsletter 52


I just recieved my new e-newsletter from Herb Mentor. I really like this website as it has so many practical how-tos and recipes with great pictures. This edition is a recipe for how to make Chamomile Popsicles.

HerbMentor News 52: How to Make Chamomile Pops

Enjoy:)

Tuesday, June 15, 2010

Make your own body products-Homemade Homemaking part 2

I recently got my order from Azure, and made my own shampoo using this recipe-Make your own herbal shampoo.  I had stop using commercial shampoo for about 3 weeks when I made this, so my hair had been clean of all that extra gunk for a while.  I did a few things differently than the recipe; which is probably why I got the results that I did.  Instead of using rose buds, I used packaged tea that had some rose blossoms along with chamomile, lemon grass and mint.  I also used a handful of fresh mint and made the "tea" to add to the shampoo.  I  left out the jojoba oil, since I was using Dr.Bronner's tea tree soap which has jojoba in it, and I left out the essential oil too.  When I washed with it the first time, I was pretty disappointed.  It felt dry and brittle and also like there was a big glob of hair gel on some of my hair.  When it dried it was really yucky feeling and greasy, like I hadn't washed my hair in a few weeks.  I know that it is supposed to be different that using commercial shampoo, but it didn't do much of anything except put more stuff on my hair.  I will try it again sometime when I can make the recipe the way that it was supposed to be made. 

In the meantime though I will use what I was using before I made this shampoo.  This combination might sound a little strange to some of you, but I had been using this for three weeks , and it works really well.  My fellow sister and churchmate Joanne shared this with me after she received it from a friend.  It is a bar of unscented homemade soap that you scrub into your hair, then you rinse it with powdered ascorbic acid.  I know, sounds crazy huh!  But it really works!  We are almost out of the bar, so we will make some ourselves using this recipe-Homemade Borax Soap.

I've gathered a list of some sites that have more homemade recipes for body products such as;


If any of you are making and using your own homemade body products,  how are they working for you?  Please share in the comments.


Sunday, May 23, 2010

The Best Herbal Remedies Book!


My husband took me out for a "date" last night.  Our place of choice-Barnes and Nobles:)  We looked around for a good hour or so, and while I was over in the Alternative Medicine section I came upon this book.

It's put out by DK Publishers and it isTHE BEST book on this subject that I have found so far.  Why is it so great, you might be asking?  Well, because it is full of beautiful pictures, accurate resources and information and it is just plain simple to use!  It tells you the history of herbal medicine, the safety of herbs, how to make remedies, where to look for the plants, how to harvest them, how to store them on so much more.  It even tells you how much scientific research has been done on a certain plant. I have not found anything that comes close to how organized and simple this book is.  The main reason I like this book so much is that it is geared more towards the "visual learner", which I am totally.  Even if you are not interested in herbal remedies, just by glancing at it, you would learn something.  I was practically begging to get it and my husband could read the delight on my face, so he gave me a very sweet "yes" to my asking for it ;)

I realized after we got home, that I could have found this book on the internet for cheaper, but hey, you live and you learn.  This is a great site that I go to when looking for books on discount- fetchbooks.info. So far I have found every single book that I have looked for on this site. Anyways, just wanted to share my excitement with the rest of the world.


Wednesday, May 19, 2010

HerbMentor News 51: How to Make Herbal Shampoo

I recently joined this website-learningherbs.com, and they send out a really neat newsletter about twice a month.  This was the first one that I recieved.  I will post more when I get them . Enjoy:)


HerbMentor News 51: How to Make Herbal Shampoo

Thursday, May 13, 2010

How to make "Recycled" Cloth Diapers- All In One

Okay, so I'm not the best seamtress, in fact I pretty much wing it every time I sew.  But it's fun and I like the challenge.  I started looking into making cloth diapers for people that I know as a gift for the new baby and found some great things at the thrift store here in town that would work well.  My friend just had twin girls and I made some for her in newborn size.  I made the soaker pad pattern myself by just taking the diaper pattern and cutting it a little smaller to fit inside the cover part.

Here is the link for the pattern that I used. I like this site and plan to use alot of there patterns.  I will try to get a list of patterns and where to get supplies together for those of you who want to sew your own diapers.

Okay here goes:

Materials that I used:
1. 100% polyester mattress cover without plastic backing- for the outer layer, pretty much water-proof because of the thick weave
2. 1 yard of micro fleece- found at Walmart
3. old washcloths, cloth diapers, towels etc- for the soaker pads
4. flannel pillow cases- to sew onto soaker for being against baby's skin
3. the smallest elastic I could find at Walmart
4. soft touch velcro
5. White all purpose thread

Step 1.

Cut out outer layer on fold

Step 2.

Cut out inner layer on fold using the same pattern as the outer layer


Step 3.
Cut out the soaker pad and liner


Step 4.
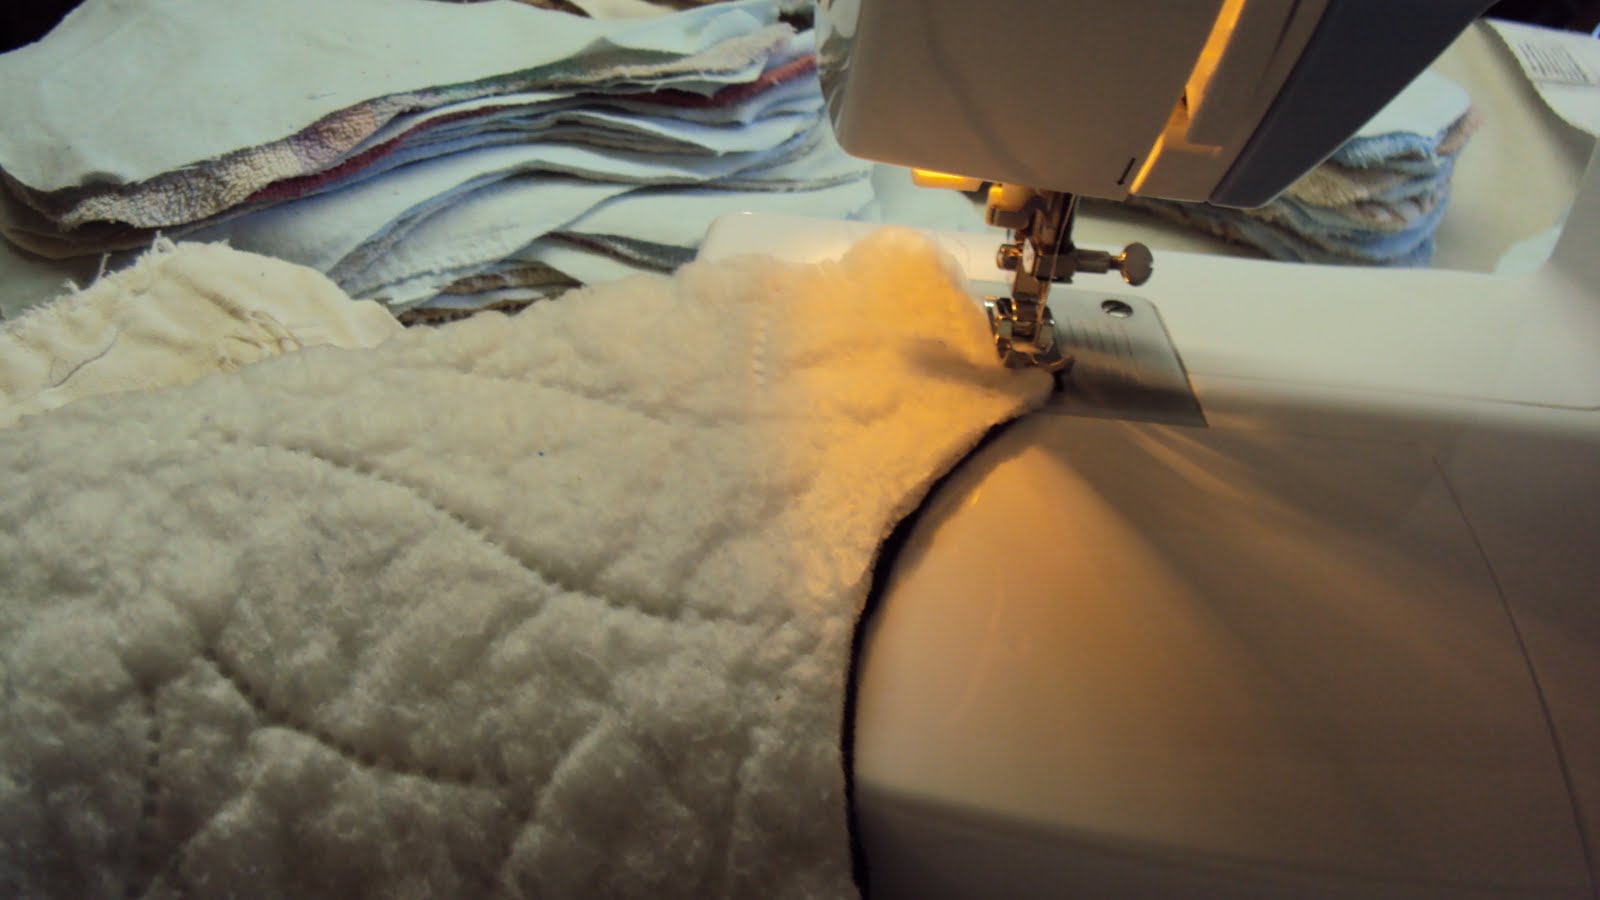
Pull out your sewing machine and get your velcro and elastic handy


Step 5.
Match your outer and inner layer up and begin zig zag or serge on one side of diaper


Sew all around diaper until about the middle of the top.  You want to leave enough open so you can turn it out to the right side.


Step 7.
Trim off the excess material so that it cuts down on the bulk


Step 8.

Attach the elastic between the front and the side tabs and stretch it as much as it will stretch. Pin it, then back stitch it so that it will stay in place when you sew it on the other side.


Step. 9

Turn diaper right side out and make sure that the elastic is where you want it to be-along the seam line.  Begin straight stitching at 5/8" seam to the side of the opening where you turned it out and pull it straight where the elastic is so that it does not get caught in the stitch.


 I also added an elastic piece to the back before I turned it out where the opening was and stitched it closed.  This will make it a little more snug for newborns that are premmie.


Step 10.
Attach velcro to the tabs, front and on one of the tabs front side.


Step 11.
Serge or zig zag the soaker to the lining.  Here is how it will lay in the diaper.

There you have it, the
finished product!


I made about 6 diapers and about 12 soakers for each baby, since the soakers will be changed out more and the diaper cover will stay dry if you can catch it early.  I will post when I get feedbback on how they held up.
If any of you sew your own diapers, what patterns and materials do you use? Please share in the comments.


Tuesday, March 16, 2010

Being a frugal kitchen maid

The Queen of Dehydrating... I have found so much invaluble info on this site...http://www.dehydrate2store/. Check out all her videos and recipes. Can't wait to start up a pantry this summer

Thursday, August 20, 2009

Make your own Pouch Sling( similar to a HotSling)

When we were in the Philippines I had to use what is called a pouch sling here in the US, except it was just a table cloth tied in the back. At first, I didn't want to use it because I thought that it looked really uncomfortable, but when my youngest was about 8 months and was not walking yet I decided to try it instead of toting him around and not being able to use my other hand. After the 2nd or 3rd time using it, he basically lived in it until he started walking good( about 14 months). He slept in it, I took him everywhere in it, and he was alot happier too. When we got back to the states, I longed to have the table cloth carrier again. I started doing some searching on google and found instructions for how to make the type of carrier that it was, except it had a bonus ( no uncomfortable knot in my shoulderblade) It took me a total of 5 minutes to sew it too! Here is the link for the video This is how mine turned out I used a heavy weight dark blue material that a friend gave me, and I cut the lining out of a jersey cotton sheet set that I bought at walmurt to use as fabric (it was cheaper to buy this than buying jersey cotton by the yard and it is easy to dye too) so that it is durable yet comfortable and cool for baby. This is how it looks on When you put baby in the "pouch" this is where they fit for the craddle hold and also for the hip carry position. You can go to youtube and find instructions for different positions. Just search for baby carrier positions I hope that this blesses someone the way it has blessed me

Homemade Crunchy Granola Bars

I have attempted to make granola about 12 times and everytime, it was just a toasted pile of oats. I thought "it can't possibly be that hard to make granola", and the truth is that it's not (once you find a good recipe:))I have found an excellenct recipe that works great and turns out better than I thought. I even added more goodies to it and that didn't effect it like the previous recipes I had tried. For all you granola lovers out there here it is: Here are the dry ingredients you will need( plus whatever else you want to add i.e. coconut, choco chips etc..)

Gather your utensils:
In large bowl mix together:
  • 2 cups oats
  • 3/4 cup brown sugar
  • 1/2 cup wheat germ( I also sprinkled in some coarse ground wheat)
  • 3/4 tsp. cinnamon
  • 1 cup flour (white or whole wheat, it's up to you)
  • 3/4 cup raisins (I just bought a bag of trail mix for 1 batch)
  • 3/4 tsp. salt
If you use a bag of trail mix with all the nuts and fruit in it, you may want to grind it a little in the blender
Now put that aside and mix these ingredients together in a bowl:
  • 1/2 cup honey (or Karo syrup)
  • 1 egg beaten
  • 1/2 cup oil
  • 2 tsp. vanilla (I didn't put this in)
Now get your large bowl and make a well in the center to pour these ingredients
Mix with a spatula or, if you prefer, your hands:) until everything is moist. Line a cookie sheet or 9x13" pan( for thicker bars) with parchment paper and spread the granola out evenly to the edges, preheat the oven at 350* Bake at 350* for 30-35 mins, or until it's brown around the edges. Let cool for about 5 minutes then cut into bars, when the granola is still soft. You don't want to wait any longer than that or it may be too hard to cut. Let cool completely then put in air tight container. I like to crumble mine up and add it to cereal or yogurt. Makes a quick, healthy snack for the little ones too:)

Tuesday, August 18, 2009

Making Refridgerator Pickles

I was given a lotta cucumbers this week so I decided to try to make my first batch of pickles. It was super easy (just what I needed for my first time), so I wanted to share the recipe with everyone out there
  1. Wash 3-4 quart jars out with boiling water to sterilize them
  2. Mix together in large bowl until sugar is dissolved( I used brown sugar since I was out of white)
  • 4 cups sugar
  • 3 cups vinegar( if mild then omit water and use 4 cups of vinegar)
  • 1 cup water
  • 1/2 cup salt
  • 1 1/4 tsp. tumeric
  • 1 1/4 tsp. celery seed( I used celery salt and just omitted 1 1/4 tsp of salt)
  • 1 1/4 tsp. mustard seed( I used ground mustard)
3.Skin the cukes and sliced them to 1/8-1/4" slices I had a little help:) 4. Get 3-4 medium sized onions and slice them up, then put them in the bottom of your jars 5. Put you cukes in until you can't fit anymore, then pour the vinegar mixture over them until they are completely covered. 6. Put your flats and rings on and screw down tight. Put in the fridge for 5 days before eating. These will keep for up to 10 months in the fridge. Enjoy!