Showing posts with label Frugal. Show all posts

Monday, August 2, 2010

Meal Plan for August 2- August 8


I'm trying to get an early start this week with meal planning, so that I don't have such a busy day on Sunday planning it.  I really needed some inspiration and spent a little longer that I wanted to find what sounded good for the coming weeks menu.  As of right now, we have about 5 gallons of ground beef in the freezer, so I'm trying to think of some good healthy recipes to use it in.  Any suggestions?  Well, here is what I have planned for this week.

Week 1 for August

Monday- Chicken Tortilla Soup with Cheesy Crescent rolls
Tuesday-Grilled Talipia with Brown Rice and Broccoli   Sweet taters and fresh salad
Wednesday-L/O
Thursday-Poor Man's Swiss Steak with Baked Potatoes and Corn
Friday-Grilled Cheese Sandwiches and Homemade Vegetable soup
Saturday-L/O
Sunday- Crockpot (Roast with onion soup gravy?)

Today I did a few things to help with our food budget-made Instant Oatmeal Packets, and Homemade Egg, Ham and Cheese HotPockets (recipe coming soon) for my hubby.  I would really like to have a lot of homemade convenience food on hand to help with saving time and money and I am spending some time lately finding a lot of great ideas!  I hope to post on them soon when I can get some of them made. 

What do you have on hand for convenience to help make your kitchen run a little bit more smoothly?

Tuesday, July 20, 2010

Baked Herbed Pork Chops with sweet taters and veggies


This would be a great meal for those busy nights or for when you forgot to plan anything for dinner.  Not only is it healthy and a stick-to-your-ribs type of meal, but it only took me around 20 minutes to prepare it.  The chops were still a little bit frozen, and I wanted them to be tender, so I baked them for about 1hr and 15 minutes with the sweet taters baking right beside them wrapped in foil. 

The Verdict
Way thumbs up!  It was easy, delicious and healthy not to mention cheap.  We picked up the chops for $.88 a lb, so a whole family pack was $3.22!

Baked Herbed Chops
  • 4-6 pork chops( bone in or out)
  • 1 cup of vinegar (I used apple cider)
  • 1 1/2 cups water
  • about 4 T of Hidden Valley Italian dressing mix ( skip the vinegar and water and just pour some of your favorite Italian dressing over the chops)
  • 2 T Butter
  • 1/4 cup flour(wheat or white)


Put the chops in a 9x13 baking dish and pour dressing over chops until they are mostly covered.  Wrap pan with foil and bake for 1hr @ 300 degrees. Poke your sweet taters with a fork or knife then microwave them for 5 mins. Wrap in foil, and place in over next to baking dishes.  Wait for approximately 1 hr for the savory aroma of your very easily prepared supper to make it's way around the house, then it's time to make the gravy and heat up your veggies.

Make a gravy base by melting 2 T butter then adding your flour.  If you still have a little bit of dry flour that is hanging out in the pan, add a little bit more butter.  Slowly add the juice from your baking dishes and mix continuously until it thickens into gravy.  While you are doing this, have your veggies steaming in another pan.
Viola!! Everything is done and ready to be served, enjoy:)

Monday, July 19, 2010

Garden Fresh Sushi- Made at home for under $3!


I love sushi!! If you love sushi, then you know what I'm talking about:) I know that some people don't want to try it because they believe that it is only made with raw fish, but that's not true.  Sushi is so versatile, you can put anything you want to in it that you like.  I made some of this the other night, and it was so easy, that even if you've never seen a sushi roll, you can make this in under 10 minutes flat!  Not to mention that it only cost about $3 total! ( that may even be way over the cost) compared to the $15   per roll you would pay at your favorite sushi spot.  This is made with veggies from the garden and a little extras.

Garden Fresh Sushi rolls( for 1-2 people)
  • 2 dried nori (dried seaweed)sheets.  These can be purchased at any Asian market. They usually come in a pack of 10 or more for under $4.
  • 1/2 cup hot rice, whatever kind you have on hand.  It's better to use left over rice that has been reheated, as it is not as mushy, but use what you got.
  • 1 Ripe Avocado
  • 3 thinly sliced sandwich slices of Tomato
  • 1/2 small cucumber
  • 2 T cream cheese (optional)
  • 3 T Soy Sauce or Braggs Liquid Aminos
  • Sriracha Japanese hot sauce
Reheat the rice by steaming it a little.  While that is steaming, slice up your avocado,  tomato, and cucumber, all julienne style (in long, thin strips). Get out your two sheets of nori and lay them on a plate,  then  pile 1/4 cup of hot rice at one end of each of the sheets, leaving about 1 inch of nori without rice on that same end, and spread the rice out like you would when filling a burrito. 

Next, lay strips of your veggies on top of the rice.  Grab that end of the sheet where you put your filling and wrap it gently over the filling until it is completely encased.  Then continue to roll up the rest of the sheet.  Lay the roll so that the end of the sheet is under the roll, so that the heat from the rice seals the roll.

 Now get a very sharp knife and lay your rolls on a cutting board and slice thin circles like you would a cinnamon roll.  Move your rolls to your plate, grab you some soy or whatever in a separate bowl and your hot sauce.  I like using chop sticks too:) 

 If you want to put cream cheese on them, just cut off a little and put little dabs on each piece with a dot of hot sauce then dip it in your soy. 

These are sooo simple and so good, I've made them twice in 3 days!  Let me know how you like them, or if you make other sushi concoctions at home.

Thursday, July 15, 2010

Meal Planning

Since we moved in and I'm having to feed a lot more people, I have taken up meal planning.  I don't know why I never did it before; looking back, that seems crazy and such a waste of time, not to mention the added stress of what to make for dinner 30 minutes before it's time to eat!  I would recommend meal planning to anyone that is the cook of the family.  And we really have no excuse these days, with the Internet and all and all the wonderful resources like blogs and free recipe sites.  Now it's easier for anyone with any cooking skills to learn new meals and cooking habits.  If you are not that good at cooking( you can cook some Kraft mac and cheese and that's about as good as it gets) then take some time and look at some of the links I have under meal planning.  These have helped me tremendously!  I hope to log all of the meals that I make each week, and this will not only help others, but it will help me to be consistent (which I have a real problem in:)  I will try to include picture when I can, and if it's something that I've never made before, I'll try and do a tutorial.  So get ready to gather round' the good stuff ( and no, I'm not talking about Pizza Hut, unless it's homemade:)

L/O is for leftovers

July

Week 2
Monday- Ground Turkey Stroganoff with Peas
Tuesday- Fish Tacos with Corn Salsa and Rice
Wednesday- L/O
Thursday- Healthy Italian Meatloaf with Mash Potatoes and Corn
Friday- Authentic Orange Chicken with Broccoli and Rice
Sat-L/O
Sunday-N/A


Week 3
Monday-Beef and Cabbage with Potato Pancakes and Steak Sauce gravy.
Tuesday-Grilled Tandori Chicken with Steamed California Blend Veggies and Basmati Rice
Wednesday-L/O
Thursday- Turkey Enchiladas with homemade sauce and Mexi Cornbread
Friday- Pizza
Saturday-L/O
Sunday- Crockpot?( not decided yet)

Saturday, May 29, 2010

Frugal Square Foot Gardening


Frugal: entailing little expense; requiring few resources; meager


Yep, that pretty much describes my first Square Foot Garden.  Here is a run down of the expenses that I put into it:

1. FREE wood from one of the brothers at our church. He got it from his work, since they were just going to throw it all away.

2. FREE soil composed of hay, cow manure, and whatever else was lying around.  It was all super composted when we pick up a load, so no, there was no smell. We got it from an elderly lady that still lives on her farm.  If you live by farm land, you could probably ask some of the farmers if you could get some dirt that was dug up for a pond or whater they would have lying around like it.

3. Bundle of wooden stakes-$8.99

4. 5 yards of fabric netting(in the fabric section, not the garden section) from Walmart- $5.99

5. 8 Tomato plants-$12.00

6. 8 Pepper plants-$8.00

7. Seeds for lettuce, spinach, beans-$8.00

8. 3Squash and 3 Zucchini-$6.50

9. FREE nails

10. FREE rope

11. FREE kite string

12. 1 1/2 bags of good top soil-$4.50

TOTAL-$53.98

I think the box is about 8'x 5'or so, yeah, we were not real accurate, but it still worked just fine.  I'm not sure what kind or size of wood was used, but when I find out, I will include that.  Here is how I planted everything....

First, we loaded all the compost into the box and spread it all even, then we watered it really good.  I really think that whatever kind of compost you can get for the cheapest price will work just fine also.  This happened to be free, but the SFG that I had made earlier this spring was a whoppin $50.00 just for the compost that you are told to buy in the book, and it was only 4'x4'.  So I was determined to find it MUCH cheaper, and I think free stuff is pretty cheap, don't you?

Next I got some a tape measure and some nails.  I measured everything off by foot and screwed in a nail at every foot.  After that, I got my kite string and wound it around all the "pegs" to make the grid. 

Now that everything was measured properly, I started my planting.  I put my pole beans, sugar snap peas  along this edge so that they could climb up the trellis:

I also planted 3 yellow squash in the far right corner, and 3 zucchini plants in the far left corner along this same edge .  Since the squash will climb up the trellis, I didn't need to worry about putting something in the square next to it, but that isn't the case with the zucchini.  I left one square beside, diagonal and in front of the zucchini empty.  That is also why I planted it in one of the end squares, so that it can grow over the side of the box and not disturb anything.


Next I planted my pepper plants in the same squares as the vining beans, since they would be up the trellis and out of the way of the peppers.  The first pepper plant was planted 2 squares away from the zucchini and then I planted a tomato plant in the middle square of this row.  I finished the row with pepper plants to even it out.


I then planted the next two rows with pepper plant in one square, then tomato plant in the next square, rotating until the end of the rows.


Finally in the last 1 1/2 rows, I planted lettuce and spinach.


All of my plants besides the beans and lettuce ,which I started from seed, were Bonnie brand and I got the plants that just plant right into the ground, pot and all.  Yesterday, I put stakes next to all the tomato plants and tied them to the stake with some soft rope, not twine or coarse rope as this would cut into the stems.  Today, my hubby used some of the stakes and made the shade cloth frame.  Then we nailed the cloth to the angled points. 

And there you have it.  I just water once a day, in the morning, as this "soil" really holds water well.  I'll keep an update on how it is growing and what we harvest out of it.  Next year, we may do a Frugal Green House like this one-PVC Greenhouse

Are any of you doing any frugal-type gardening?  Please leave a comment, as I'd love to hear about it!


Thursday, May 13, 2010

How to make "Recycled" Cloth Diapers- All In One

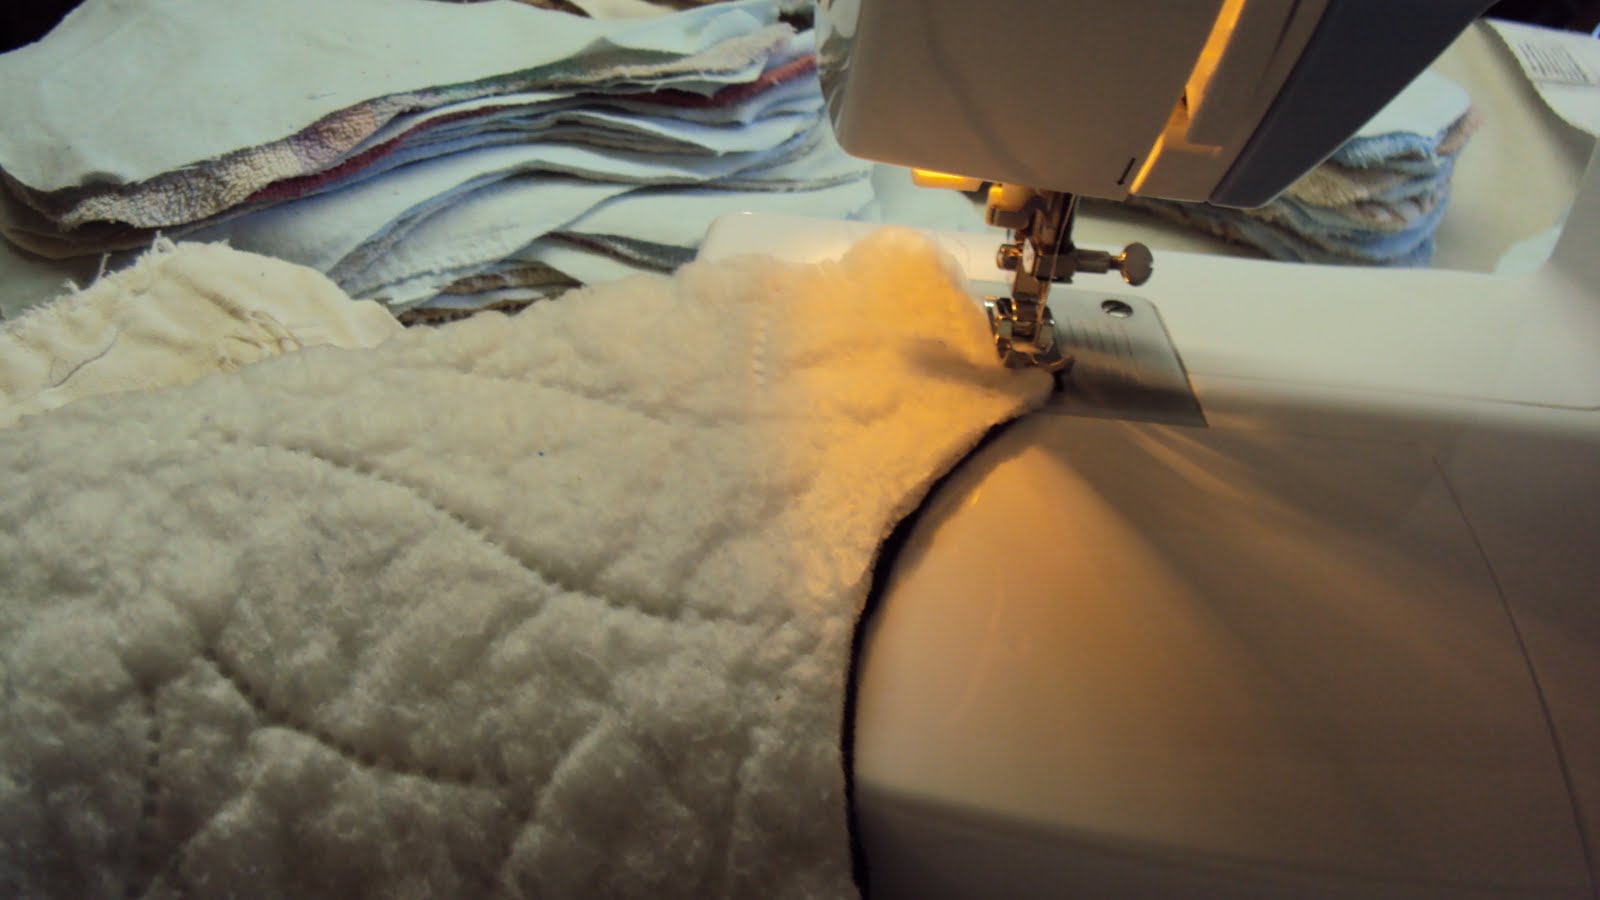
Okay, so I'm not the best seamtress, in fact I pretty much wing it every time I sew.  But it's fun and I like the challenge.  I started looking into making cloth diapers for people that I know as a gift for the new baby and found some great things at the thrift store here in town that would work well.  My friend just had twin girls and I made some for her in newborn size.  I made the soaker pad pattern myself by just taking the diaper pattern and cutting it a little smaller to fit inside the cover part.

Here is the link for the pattern that I used. I like this site and plan to use alot of there patterns.  I will try to get a list of patterns and where to get supplies together for those of you who want to sew your own diapers.

Okay here goes:

Materials that I used:
1. 100% polyester mattress cover without plastic backing- for the outer layer, pretty much water-proof because of the thick weave
2. 1 yard of micro fleece- found at Walmart
3. old washcloths, cloth diapers, towels etc- for the soaker pads
4. flannel pillow cases- to sew onto soaker for being against baby's skin
3. the smallest elastic I could find at Walmart
4. soft touch velcro
5. White all purpose thread

Step 1.

Cut out outer layer on fold

Step 2.

Cut out inner layer on fold using the same pattern as the outer layer


Step 3.
Cut out the soaker pad and liner


Step 4.
Pull out your sewing machine and get your velcro and elastic handy


Step 5.
Match your outer and inner layer up and begin zig zag or serge on one side of diaper


Sew all around diaper until about the middle of the top.  You want to leave enough open so you can turn it out to the right side.


Step 7.
Trim off the excess material so that it cuts down on the bulk


Step 8.

Attach the elastic between the front and the side tabs and stretch it as much as it will stretch. Pin it, then back stitch it so that it will stay in place when you sew it on the other side.


Step. 9

Turn diaper right side out and make sure that the elastic is where you want it to be-along the seam line.  Begin straight stitching at 5/8" seam to the side of the opening where you turned it out and pull it straight where the elastic is so that it does not get caught in the stitch.


 I also added an elastic piece to the back before I turned it out where the opening was and stitched it closed.  This will make it a little more snug for newborns that are premmie.


Step 10.
Attach velcro to the tabs, front and on one of the tabs front side.


Step 11.
Serge or zig zag the soaker to the lining.  Here is how it will lay in the diaper.

There you have it, the
finished product!


I made about 6 diapers and about 12 soakers for each baby, since the soakers will be changed out more and the diaper cover will stay dry if you can catch it early.  I will post when I get feedbback on how they held up.
If any of you sew your own diapers, what patterns and materials do you use? Please share in the comments.


Tuesday, March 16, 2010

Being a frugal kitchen maid

The Queen of Dehydrating... I have found so much invaluble info on this site...http://www.dehydrate2store/. Check out all her videos and recipes. Can't wait to start up a pantry this summer

Tuesday, September 22, 2009

Becentsable workshop

My dh and I went to the workshop yesturday. In all honesty, I was not that impressed, but I did learn some things and I have more of an idea now of how to get started. We actually missed some of the first part of it due to bad weather, but we got caught up after a little while. Our educator was really good and knowledgable, but I think that the program could be a little more in-depth. They only have a very short time to go over awholelotta information. As I put these things into practice, I'll post about it. I did score 12 more sets of inserts at the gas station that I went to last week, so soon I will have quite a stash of coupons! If any of you are starting out in couponing leave me a comment as to how it is going for you

Tuesday, September 15, 2009

Buried Treasure!

Okay, so how many people that you know use coupons? As for me, I've never even seen anyone use them let alone used one myself. I thought that coupons were just for people that bought alot of junk food and wanted to save a very little bit on that purchase. That is until I found a blog that shows how this lady uses them. I had never in my life heard of people using coupons like this and I thought that it was not possible. That is until I found many more sites ( more than 50) that showed that these people were doing the same thing.

This was like finding buried treasure for me! My family has a budget of $47.50 a week for groceries. That includes perishables and non perishables. Talk about a daunghting task! I found the website Becentsable.net that offers workshops that teach you how to maximize your savings at the store using coupons. I am planning on attending on September 21( I'll blog about what I learned there afterwards). I also found wonderful sites ( I will add them into my sidebar later) that help you learn everything you need to know about couponing, stockpiling( here are some pics of stockpiles), rebates etc...
So lately I have made a major change in lifestyle. I am no longer ignorant to the major stores agenda, and plan to spend as little as need be to get the things we need.
I also found these great sites-Hotcouponworld.com and STL Mommy. They are so helpful and loaded with info that is essential for being a savvy saver. I had no clue of what to do, so I set out to learn as much as I could this past weekend. I read coupons inserts come mainly in the Sunday paper, and that sometimes you could get them for free if they hadn't sold. So I went to every gas station in town to see if I could get any for free and guess what? One place let me have 12 papers worth of inserts!! They said that I could do that every Sunday!! I decided to get alot right from the start, since I read and saw pictures of so many people that stockpile and they get 40 or more a week. I was excited and right away started asking questions on these websites to find out how to use what I had gotten. The first thing they told me to do was to organize them in stacks and then file them away with the name of the certain insert and date. They said not to clip them, but to just file them away and clip when I need a certain coupon. I thought that I would organize it a little bit more and used some sticky tabs to list what coupons I wanted from inside the insert, then I just stuck it right on the front of that insert. This is as far as I have gotten so far, but I will keep posting on this subject since it is completely new to me and I am learning from scratch. Hopefully I can complile a "how to use coupons" once I have gotten my feet a little wet.

Friday, September 11, 2009

New Cookbook and Meal Planning

Since returning to the US, we have really seen the need in our own lives to live and spend as frugally as we can. My husband is working only 4 days a week (and it depends on the weather most of the time since he is a construction worker) and attending Paramedic school for 2 days. We figured that our budget for food weekly comes out to be around 35$. So I have searched all over the internet and have been excited about all that I have found in regards to saving money by using coupons, rebates etc. I hope to add another section to my blog about this in the future when I have tried it and gotten past the "newbie stage". I will also be attending a Becentsable.net workshop, and will post about that after we go. I have been looking for good, simple, nutritious cookbooks and have had a real hard time finding one that I would use almost daily. That is until I stubbled onto this at the library. This cookbook is simply put -practical and fun. It has great recipes that are unique and simple. I made one the other morning called "Sausage and Egg gravy over biscuits" and my husband even told his boss about it at work since it was so good (a very rare occasion). It is in a format that works like a meal plan for the whole year! It has cute little ideas for kids like peanut butter playdough and cleaning and kitchen tips that are really useful. Kudos to Penny E. Stone for this cookbook. I plan to buy it and found one on fetchbooks.info for $ .60. Check it out. Let me know if you have a treasured cookbook that fits all your families needs, I'd love to find more like this one.

Thursday, August 20, 2009

Make your own Pouch Sling( similar to a HotSling)

When we were in the Philippines I had to use what is called a pouch sling here in the US, except it was just a table cloth tied in the back. At first, I didn't want to use it because I thought that it looked really uncomfortable, but when my youngest was about 8 months and was not walking yet I decided to try it instead of toting him around and not being able to use my other hand. After the 2nd or 3rd time using it, he basically lived in it until he started walking good( about 14 months). He slept in it, I took him everywhere in it, and he was alot happier too. When we got back to the states, I longed to have the table cloth carrier again. I started doing some searching on google and found instructions for how to make the type of carrier that it was, except it had a bonus ( no uncomfortable knot in my shoulderblade) It took me a total of 5 minutes to sew it too! Here is the link for the video This is how mine turned out I used a heavy weight dark blue material that a friend gave me, and I cut the lining out of a jersey cotton sheet set that I bought at walmurt to use as fabric (it was cheaper to buy this than buying jersey cotton by the yard and it is easy to dye too) so that it is durable yet comfortable and cool for baby. This is how it looks on When you put baby in the "pouch" this is where they fit for the craddle hold and also for the hip carry position. You can go to youtube and find instructions for different positions. Just search for baby carrier positions I hope that this blesses someone the way it has blessed me