Here is the link for the pattern that I used. I like this site and plan to use alot of there patterns. I will try to get a list of patterns and where to get supplies together for those of you who want to sew your own diapers.
Okay here goes:
Materials that I used:
1. 100% polyester mattress cover without plastic backing- for the outer layer, pretty much water-proof because of the thick weave
2. 1 yard of micro fleece- found at Walmart
3. old washcloths, cloth diapers, towels etc- for the soaker pads
4. flannel pillow cases- to sew onto soaker for being against baby's skin
3. the smallest elastic I could find at Walmart
4. soft touch velcro
5. White all purpose thread
Step 1.
Cut out outer layer on fold
Step 2.
Step 3.
Cut out the soaker pad and liner
Step 4.
Pull out your sewing machine and get your velcro and elastic handy
Step 5.
Match your outer and inner layer up and begin zig zag or serge on one side of diaper
Sew all around diaper until about the middle of the top. You want to leave enough open so you can turn it out to the right side.
Step 7.
Trim off the excess material so that it cuts down on the bulk
Step 8.
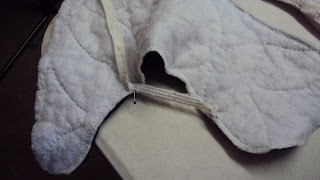
Attach the elastic between the front and the side tabs and stretch it as much as it will stretch. Pin it, then back stitch it so that it will stay in place when you sew it on the other side.
Step. 9
Turn diaper right side out and make sure that the elastic is where you want it to be-along the seam line. Begin straight stitching at 5/8" seam to the side of the opening where you turned it out and pull it straight where the elastic is so that it does not get caught in the stitch.
I also added an elastic piece to the back before I turned it out where the opening was and stitched it closed. This will make it a little more snug for newborns that are premmie.
Step 10.
Attach velcro to the tabs, front and on one of the tabs front side.
Step 11.
Serge or zig zag the soaker to the lining. Here is how it will lay in the diaper.
There you have it, the
finished product!
I made about 6 diapers and about 12 soakers for each baby, since the soakers will be changed out more and the diaper cover will stay dry if you can catch it early. I will post when I get feedbback on how they held up.
If any of you sew your own diapers, what patterns and materials do you use? Please share in the comments.


No comments:
Post a Comment